產生公私鑰
mkdir -p ~/.ssh
cd ~/.ssh
ssh-keygen -f id_rsa -t rsa -N ''
將公鑰寫入server的authorized_keys
cat ~/.ssh/id_rsa.pub | ssh username@serverip "cat >> ~/.ssh/authorized_keys"
mkdir -p ~/.ssh
cd ~/.ssh
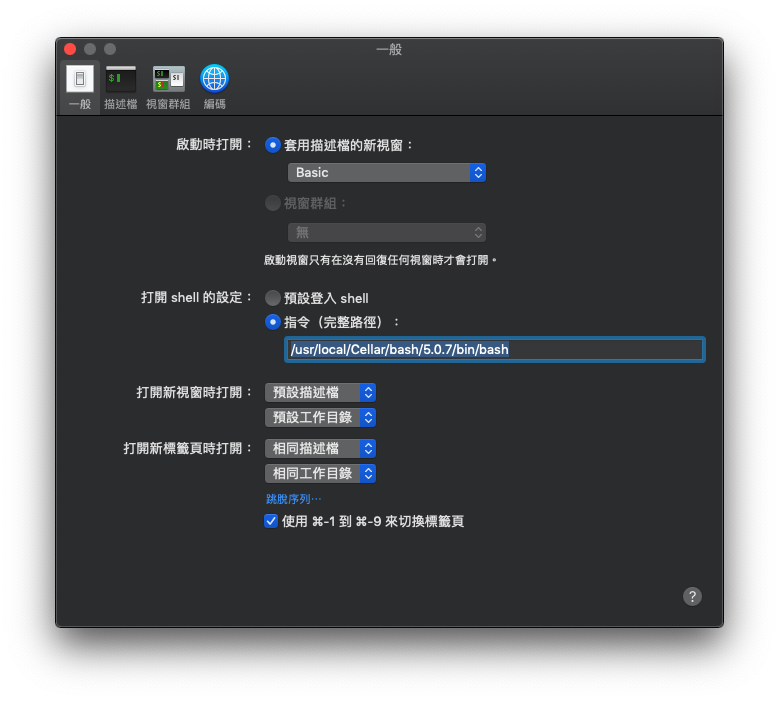
ssh-keygen -f id_rsa -t rsa -N ''cat ~/.ssh/id_rsa.pub | ssh username@serverip "cat >> ~/.ssh/authorized_keys"brew install bash將/usr/local/Cellar/bash/5.0.7/bin/bash設定為shell預設啟動指令:

kubectl create ns slanlakubectl -n tw-sgis create sa slanlacat <<EOF > slanla-user-role.yml
kind: Role
apiVersion: rbac.authorization.k8s.io/v1
metadata:
namespace: tw-sgis
name: slanla-user-pod
rules:
- apiGroups: ["*"]
resources: ["pods", "pods/log"]
verbs: ["get", "watch", "list", "update", "create", "delete"]
EOF
kubectl apply -f slanla-user-role.ymlkubectl create rolebinding slanla-view-pod \
--role=slanla-user-pod \
--serviceaccount=tw-sgis:slanla \
--namespace=tw-sgisSECRET=$(kubectl -n tw-sgis get sa slanla -o go-template='{{range .secrets}}{{.name}}{{end}}')API_SERVER="https://xxx.xxx.xxx.xxx:6443"CA_CERT=$(kubectl -n tw-sgis get secret ${SECRET} -o yaml | awk '/ca.crt:/{print $2}')cat <<EOF > slanla.conf
apiVersion: v1
kind: Config
clusters:
- cluster:
certificate-authority-data: $CA_CERT
server: $API_SERVER
name: cluster
EOFTOKEN=$(kubectl -n tw-sgis get secret ${SECRET} -o go-template='{{.data.token}}')kubectl config set-credentials slanla-user \
--token=`echo ${TOKEN} | base64 -d` \
--kubeconfig=slanla.confkubectl config set-context default \
--cluster=cluster \
--user=slanla-user \
--kubeconfig=slanla.confkubectl config use-context default \
--kubeconfig=slanla.conf測試資料:
INSERT INTO `test` (`user`, `pswd`) VALUES ('test', 'ABcd+1234');一般常見做法
SELECT `user` FROM `test` WHERE `user`='test' and `pswd`=sha1('ABcd+1234')較安全做法,但是會增加DB CPU的功耗!
SELECT `user` FROM `test` WHERE `user`='test' and sha1(CONCAT(`pswd`,9999))=sha1(CONCAT(sha1('ABcd+1234'),9999))#更新
yum update -y && yum autoremove -y
#安裝常用工具,如vim/wget/openssh-server/nslookup/ping/ifconfig
yum install -y git vim wget openssh* nfs-utils nfs-utils-lib open-vm-tools net-tools bind-utils iputils yum-utils
#設定ssh
mkdir -p ~/.ssh
cat <<EOF > ~/.ssh/config
Host *
StrictHostKeyChecking no
EOF
#關閉swap
SWAPLINE=$(cat /etc/fstab | grep swap | awk '{print $1}' | sed 's/\//\\\//g')
sed -i "s/$SWAPLINE/#$SWAPLINE/g" /etc/fstab
swapoff -a
free -m
#關閉SELINUX
setenforce 0
sed -i s/^SELINUX=.*$/SELINUX=disabled/ /etc/selinux/config
systemctl disable firewalld.service
systemctl disable libvirtd.service
#Forward Policy
iptables -P FORWARD ACCEPT
#關閉防火牆
iptables -P FORWARD ACCEPT
systemctl stop firewalld
systemctl disable firewalld
#NTP校時
yum install ntp ntpdate ntp-doc -y
cat > /etc/ntp.conf <<EOL
restrict 127.0.0.1
restrict ::1
server time.stdtime.gov.tw minpoll 1 maxpoll 3
server tock.stdtime.gov.tw minpoll 2 maxpoll 3
server watch.stdtime.gov.tw minpoll 3 maxpoll 4
server clock.stdtime.gov.tw minpoll 4 maxpoll 5
server tick.stdtime.gov.tw minpoll 5 maxpoll 6
includefile /etc/ntp/crypto/pw
keys /etc/ntp/keys
disable monitor
EOL
systemctl stop ntpd
ntpdate time.stdtime.gov.tw
systemctl enable ntpd
systemctl start ntpd
ntpq -p
function post($url, $post){
  $context = array();
  if (is_array($post)){
    ksort($post);
    $context['http'] = array(
      'method' => 'POST',
      'content' => http_build_query($post, '', '&')
    );
  }
  else{
    $context['http'] = array(
      'method' => 'POST',
      'content' => $post
    );
  }
  return @file_get_contents($url, false, stream_context_create($context));
}wget https://repo.anaconda.com/miniconda/Miniconda3-latest-MacOSX-x86_64.sh -O ~/miniconda.sh
bash ~/miniconda.sh -b -p $HOME/minicondaecho 'PATH="$HOME/miniconda/bin:$PATH"' >> ~/.bash_profile
chmod +x ~/.bash_profile
PATH="$HOME/miniconda/bin:$PATH"macos/ubuntu supported
rand_str=$(cat /dev/urandom | env LC_CTYPE=C tr -dc a-zA-Z0-9 | head -c 16)
echo $rand_str
macos unsupported
rand_str=$(cat /dev/urandom | tr -dc 'a-zA-Z0-9' | fold -w 32 | head -n 1)
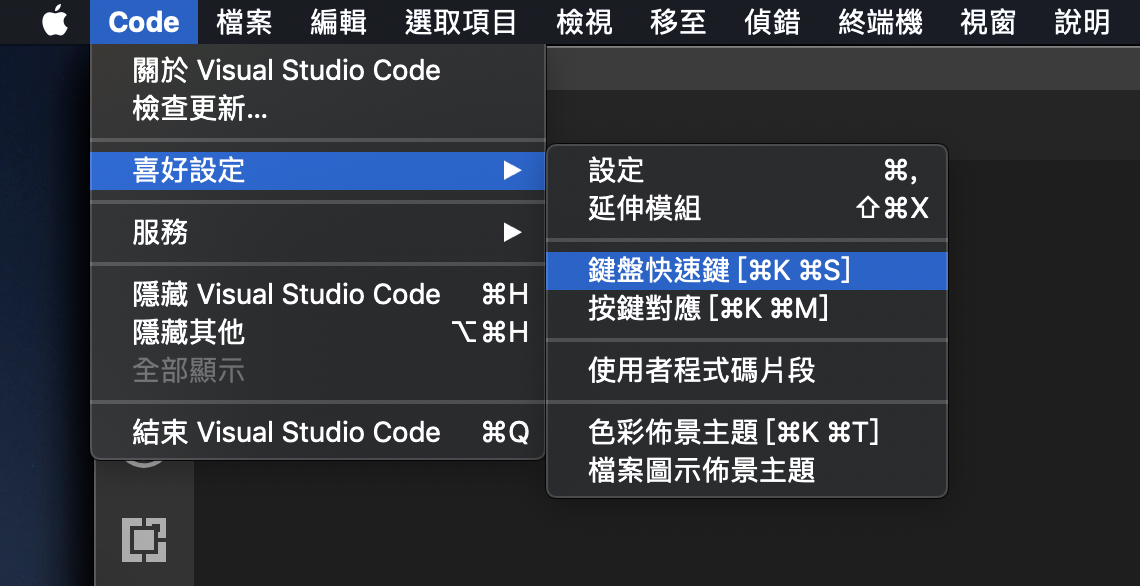
echo $rand_str開啟[偏好設定]中的[鍵盤設定]

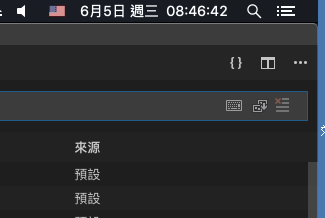
點選左上角的{}

加入
[
    {
        "key": "ctrl+alt+p",
        "command": "git.push"
    }
]
就可以用ctrl+alt+p來推送.
git在windows下對於pull下來檔案的換行有三種處理方式:
若不清楚目前設定是哪一種,可以用下列指令查詢:
git config core.autocrlf若要修改成input,則可用下列指令修改(請用超級管理者執行命令提示字元)
git config --system core.autocrlf input或是(一般使用者)
git config --global core.autocrlf input