使用brew
brew install gnu-sed coreutils
echo "alias sed=\"`which gsed`\"" >> ~/.bash_profile
echo "alias readlink=greadlink" >> ~/.bash_profile

使用brew
brew install gnu-sed coreutils
echo "alias sed=\"`which gsed`\"" >> ~/.bash_profile
echo "alias readlink=greadlink" >> ~/.bash_profile
假設cntos ip是172.16.1.1,想要分享的資料夾是/volume1/nfs
只需要用下列指令就可以架設好nfs server
yum install nfs-utils -y
echo "/volume1/nfs 172.16.0.0/16(rw,sync,no_root_squash,no_all_squash)" >> /etc/exports

systemctl enable rpcbind
systemctl enable nfs-server
systemctl enable nfs-lock
systemctl enable nfs-idmap
systemctl start rpcbind
systemctl start nfs-server
systemctl start nfs-lock
systemctl start nfs-idmap
client端部分只需要:
echo "172.16.1.1:/volume1/nfs /nfs nfs rw 0 0" >> /etc/fstab
mkdir -p /nfs
mount -a
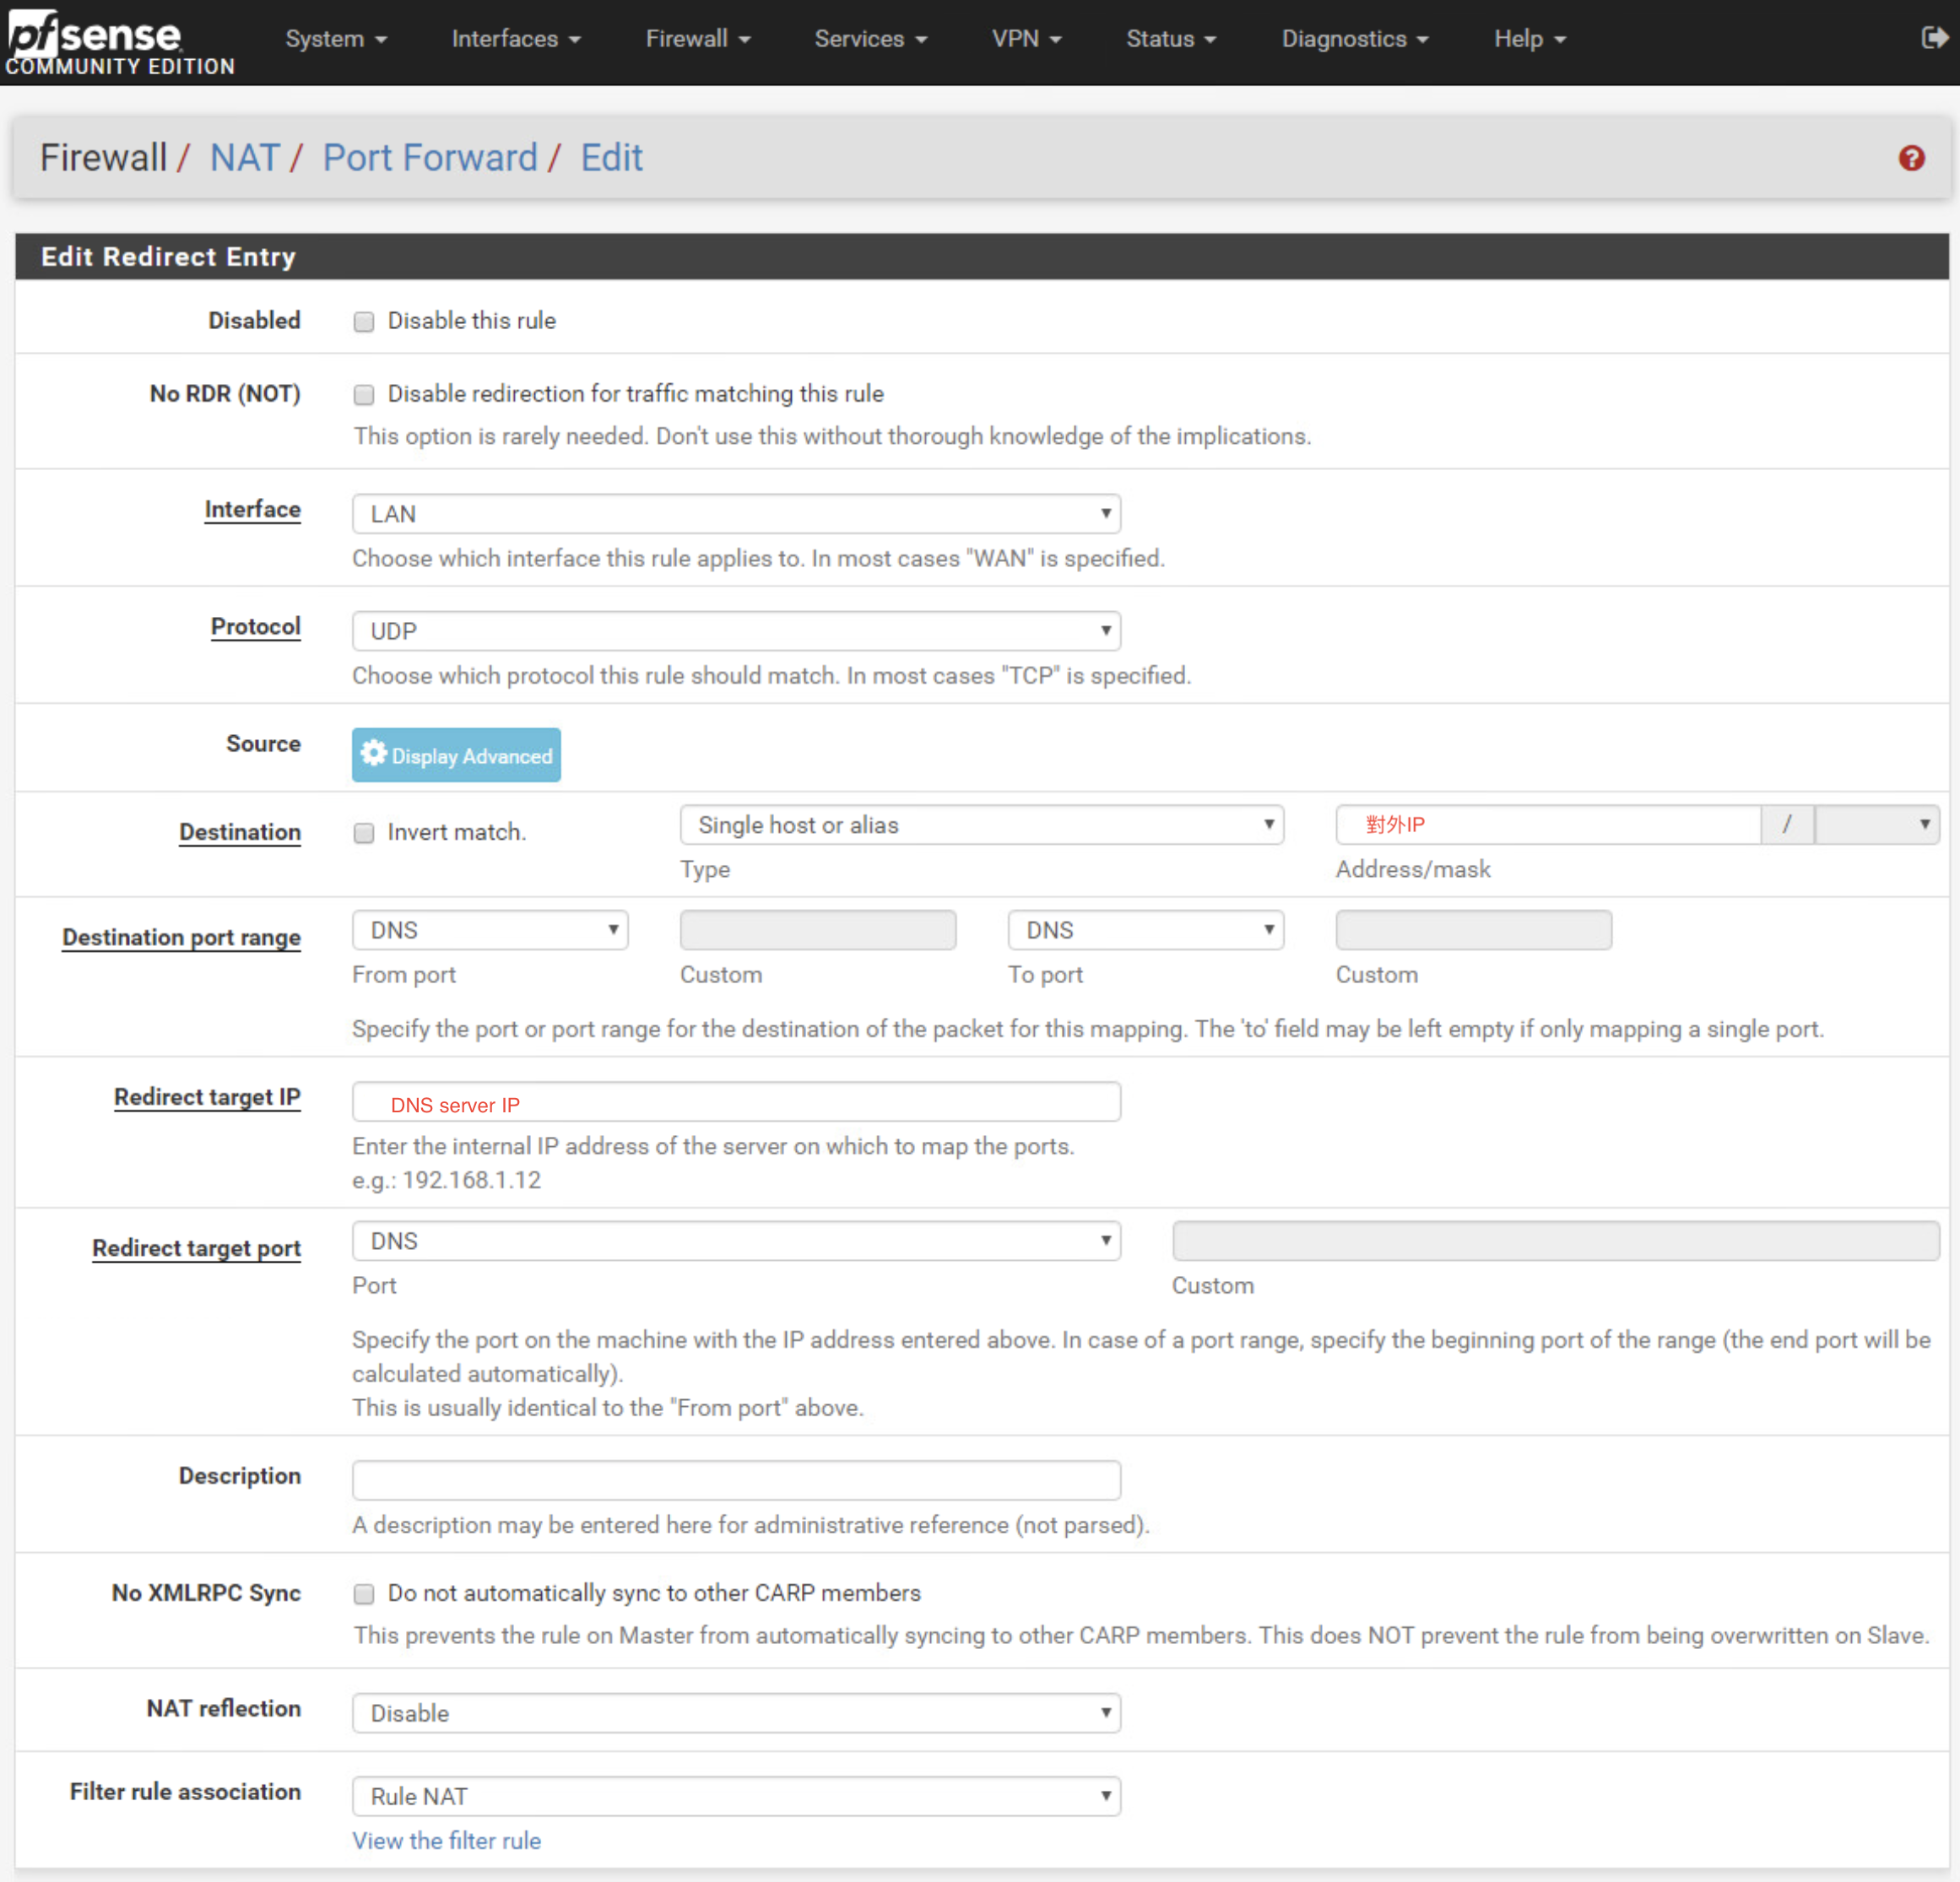
儘管已經做了DNS server的NAT
卻只能從外部IP對DNS server做查詢.
但內網對無法做查詢.
解決辦法是在NAT中,將所有內網連到外部IP的DNS查詢,導向DNS server

refer:
https://www.netgate.com/docs/pfsense/nat/accessing-port-forwards-from-local-networks.html
https://www.netgate.com/docs/pfsense/dns/redirecting-all-dns-requests-to-pfsense.html
利用curl取得對外ip
curl http://ipecho.net/plain ; echo
如下:
#安裝必要套件
yum –y update
yum install kernel-devel kernel-headers gcc dkms acpid libglvnd-glx libglvnd-opengl libglvnd-devel pkgconfig pciutils gcc-c++ wget
yum groupinstall "Development Tools" -y

#Nvidia 硬體檢查
lspci | grep -E "VGA|3D"

#Blacklist nouveau
echo "blacklist nouveau" >> /etc/modprobe.d/nvidia-installer-disable-nouveau.conf && echo "options nouveau modeset=0" >> /etc/modprobe.d/nvidia-installer-disable-nouveau.conf

#regenerate the initramfs
dracut /boot/initramfs-$(uname -r).img $(uname -r) --force
reboot

wget http://tw.download.nvidia.com/XFree86/Linux-x86_64/410.78/NVIDIA-Linux-x86_64-410.78.run
bash NVIDIA-Linux-x86_64-410.78.run

#下載cuda
wget https://developer.nvidia.com/compute/cuda/10.0/Prod/local_installers/cuda_10.0.130_410.48_linux
mv cuda_10.0.130_410.48_linux cuda_10.0.130_410.48_linux.run

#安裝cuda
bash cuda_10.0.130_410.48_linux.run

export LD_LIBRARY_PATH=$LD_LIBRARY_PATH:/usr/local/cuda-10.0/lib64
export CUDA_HOME=/usr/local/cuda-10.0
export PATH=$PATH:/usr/local/cuda-10.0/bin

cd ~/NVIDIA_CUDA-10.0_Samples/1_Utilities/deviceQuery
make
./deviceQuery

cd ~/NVIDIA_CUDA-10.0_Samples/0_Simple/vectorAdd
make
./vectorAdd
刪除所有k8s上面的pod
kubectl get pods --all-namespaces -o wide | awk '{print $1 " " $2}' | while read AA BB; do kubectl delete pod --grace-period=0 --force -n $AA $BB; done
刪除所有k8s上面所有非Running的pod
kubectl get pods --all-namespaces -o wide | grep -v Running | awk '{print $1 " " $2}' | while read AA BB; do kubectl delete pod --grace-period=0 --force -n $AA $BB; done
使用如下指令,在fastestmirror.conf中,將.cn設定為exclude:
rm -r -f /var/cache/yum/timedhosts.txt
echo "exclude=.cn" >> /etc/yum/pluginconf.d/fastestmirror.conf
在維護模式下,以ssh進入主機後.
使用下列指令,進行升級.
esxcli software profile update --depot=/vmfs/volumes/[datastore]/update-from-esxi6.7-6.7_update01.zip -p ESXi-6.7.0-20181002001-standard
之後重開機既可.
先用ssh以管理者身份登入Synology Nas.
接著輸入下列指令,就可以修改root密碼.
sudo synouser --setpw root [PASSWORD]
並設定允許root登入
sudo -i
echo "PermitRootLogin yes" >> /etc/ssh/sshd_config
cat /etc/ssh/sshd_config | grep "PermitRootLogin yes"
重啟ssh service
sudo synoservicectl --restart sshd
如果重啟很久,可以到Synology控制台中,手動重啟SSH服務
之前都用yaml部署nfs-client.
但缺點是每次kubernets跟nfs-client版本更換之後,
就可能會發生部署有問題,像是權限…等
剛剛在kubernetes 1.12上面用之前1.10所用的nfs-client之yaml檔案.
結果又出問題了.
後來發現helm有提供nfs-client部署方式.
二話不說,立刻改用helm部署.
語法如下:
helm install stable/nfs-client-provisioner \
  --name nfs-client \
  --set nfs.server=xxx.xxx.xxx.xxx \
  --set nfs.path=/path \
  --set storageClass.name=managed-nfs-storage